
DIY Crafts: How to Make Plant Hangers
Looking for an easy way to add a little more life to your home? Plants are the perfect solution! Bringing a touch of the outdoors inside, they’re a guaranteed way to brighten up your living space. And, lucky for you, we’re here to show you how to create your very own plant hangers, that take up next to no room! Suspended from the coat rack in your hallway, fixed to your bedroom wall or dangled from the curtain rod in your living room, there are plenty of plant-perfect spots around your home. So, if you’re interested in adding a little greenery to your abode, read on to discover our guide to creating three different types of unique and inexpensive plant hangers! Get crafty this season...
_UK.jpg)
_UK.jpg)
_UK.jpg)
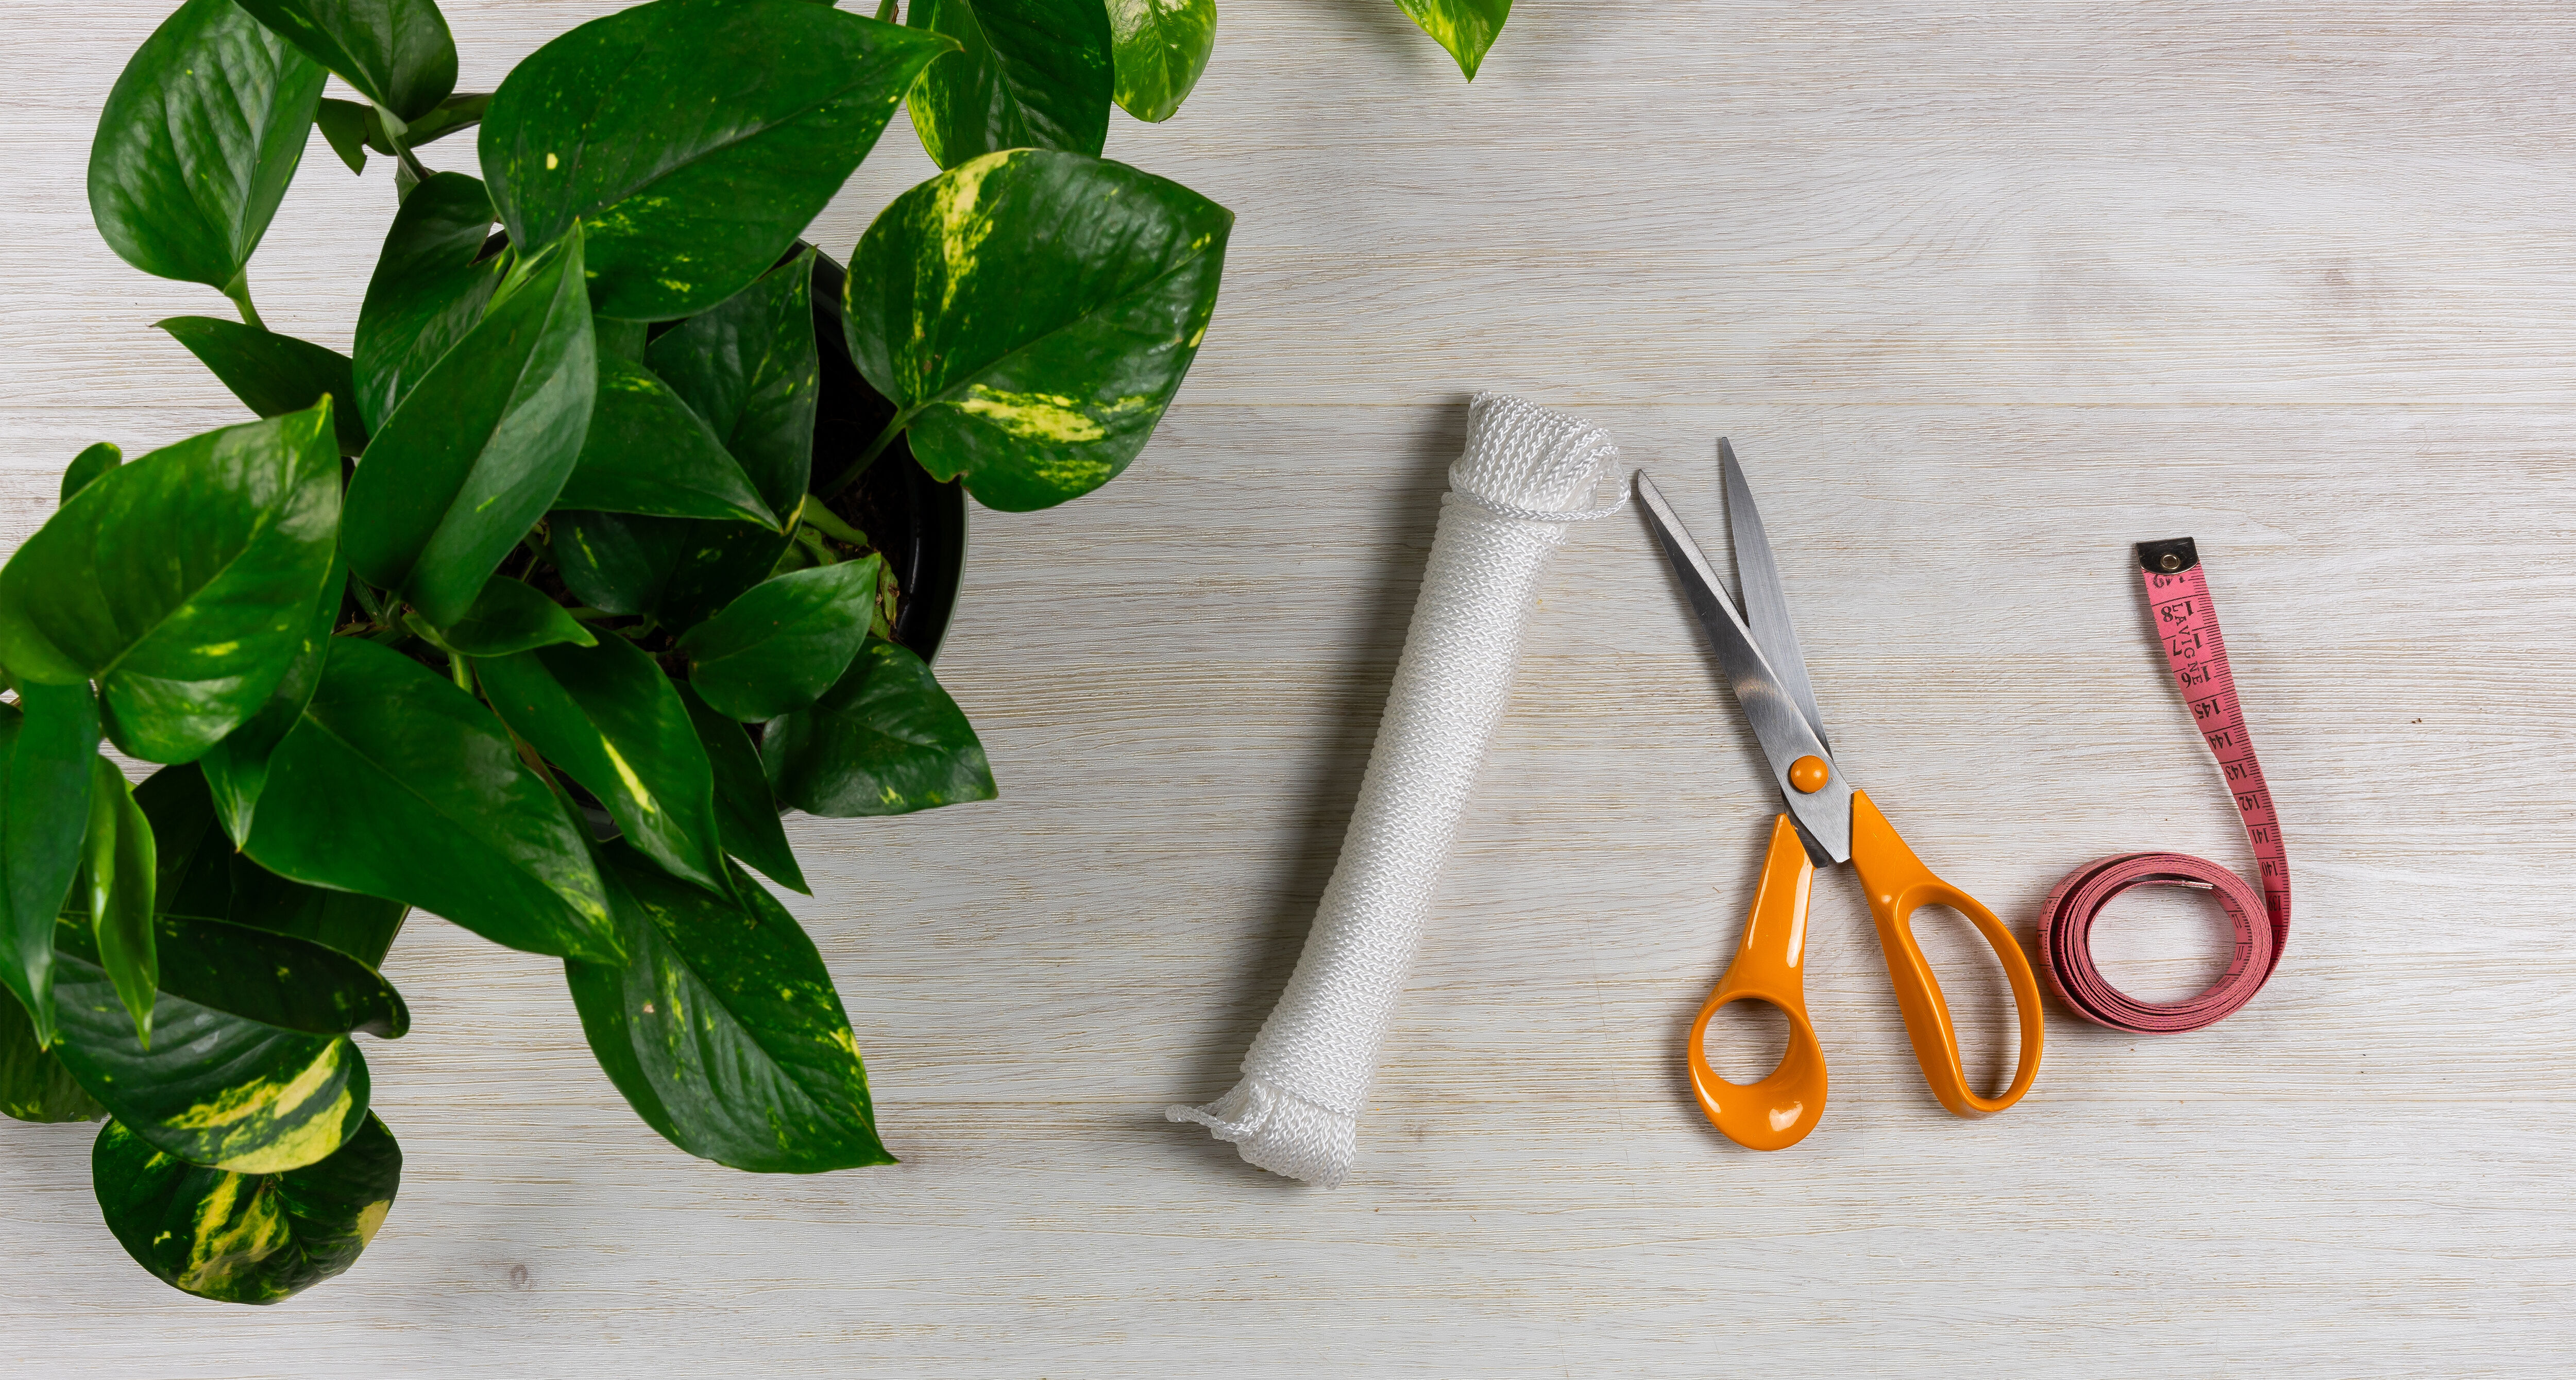
Macramé Plant Hanger
What you’ll need:
• 15 metres of cord
• 1 pair of scissors
• 1 measuring tape or ruler
• 1 potted plant


1. Using your measuring tape and scissors, measure and cut a metre-long piece of cord.
Use this cutting as a template and cut 12 more pieces of cord the same length, so that you have 13 pieces in total.
Use this cutting as a template and cut 12 more pieces of cord the same length, so that you have 13 pieces in total.
2. You will want to put one of these pieces aside for now, to use at the final step.
Start by taking the remaining 12 pieces and lining them up next to one another, ensuring that they are all sitting at roughly the same length. Tie a knot around all 12 pieces at the top, around 7-8 cm from the edge of the cord.
Start by taking the remaining 12 pieces and lining them up next to one another, ensuring that they are all sitting at roughly the same length. Tie a knot around all 12 pieces at the top, around 7-8 cm from the edge of the cord.
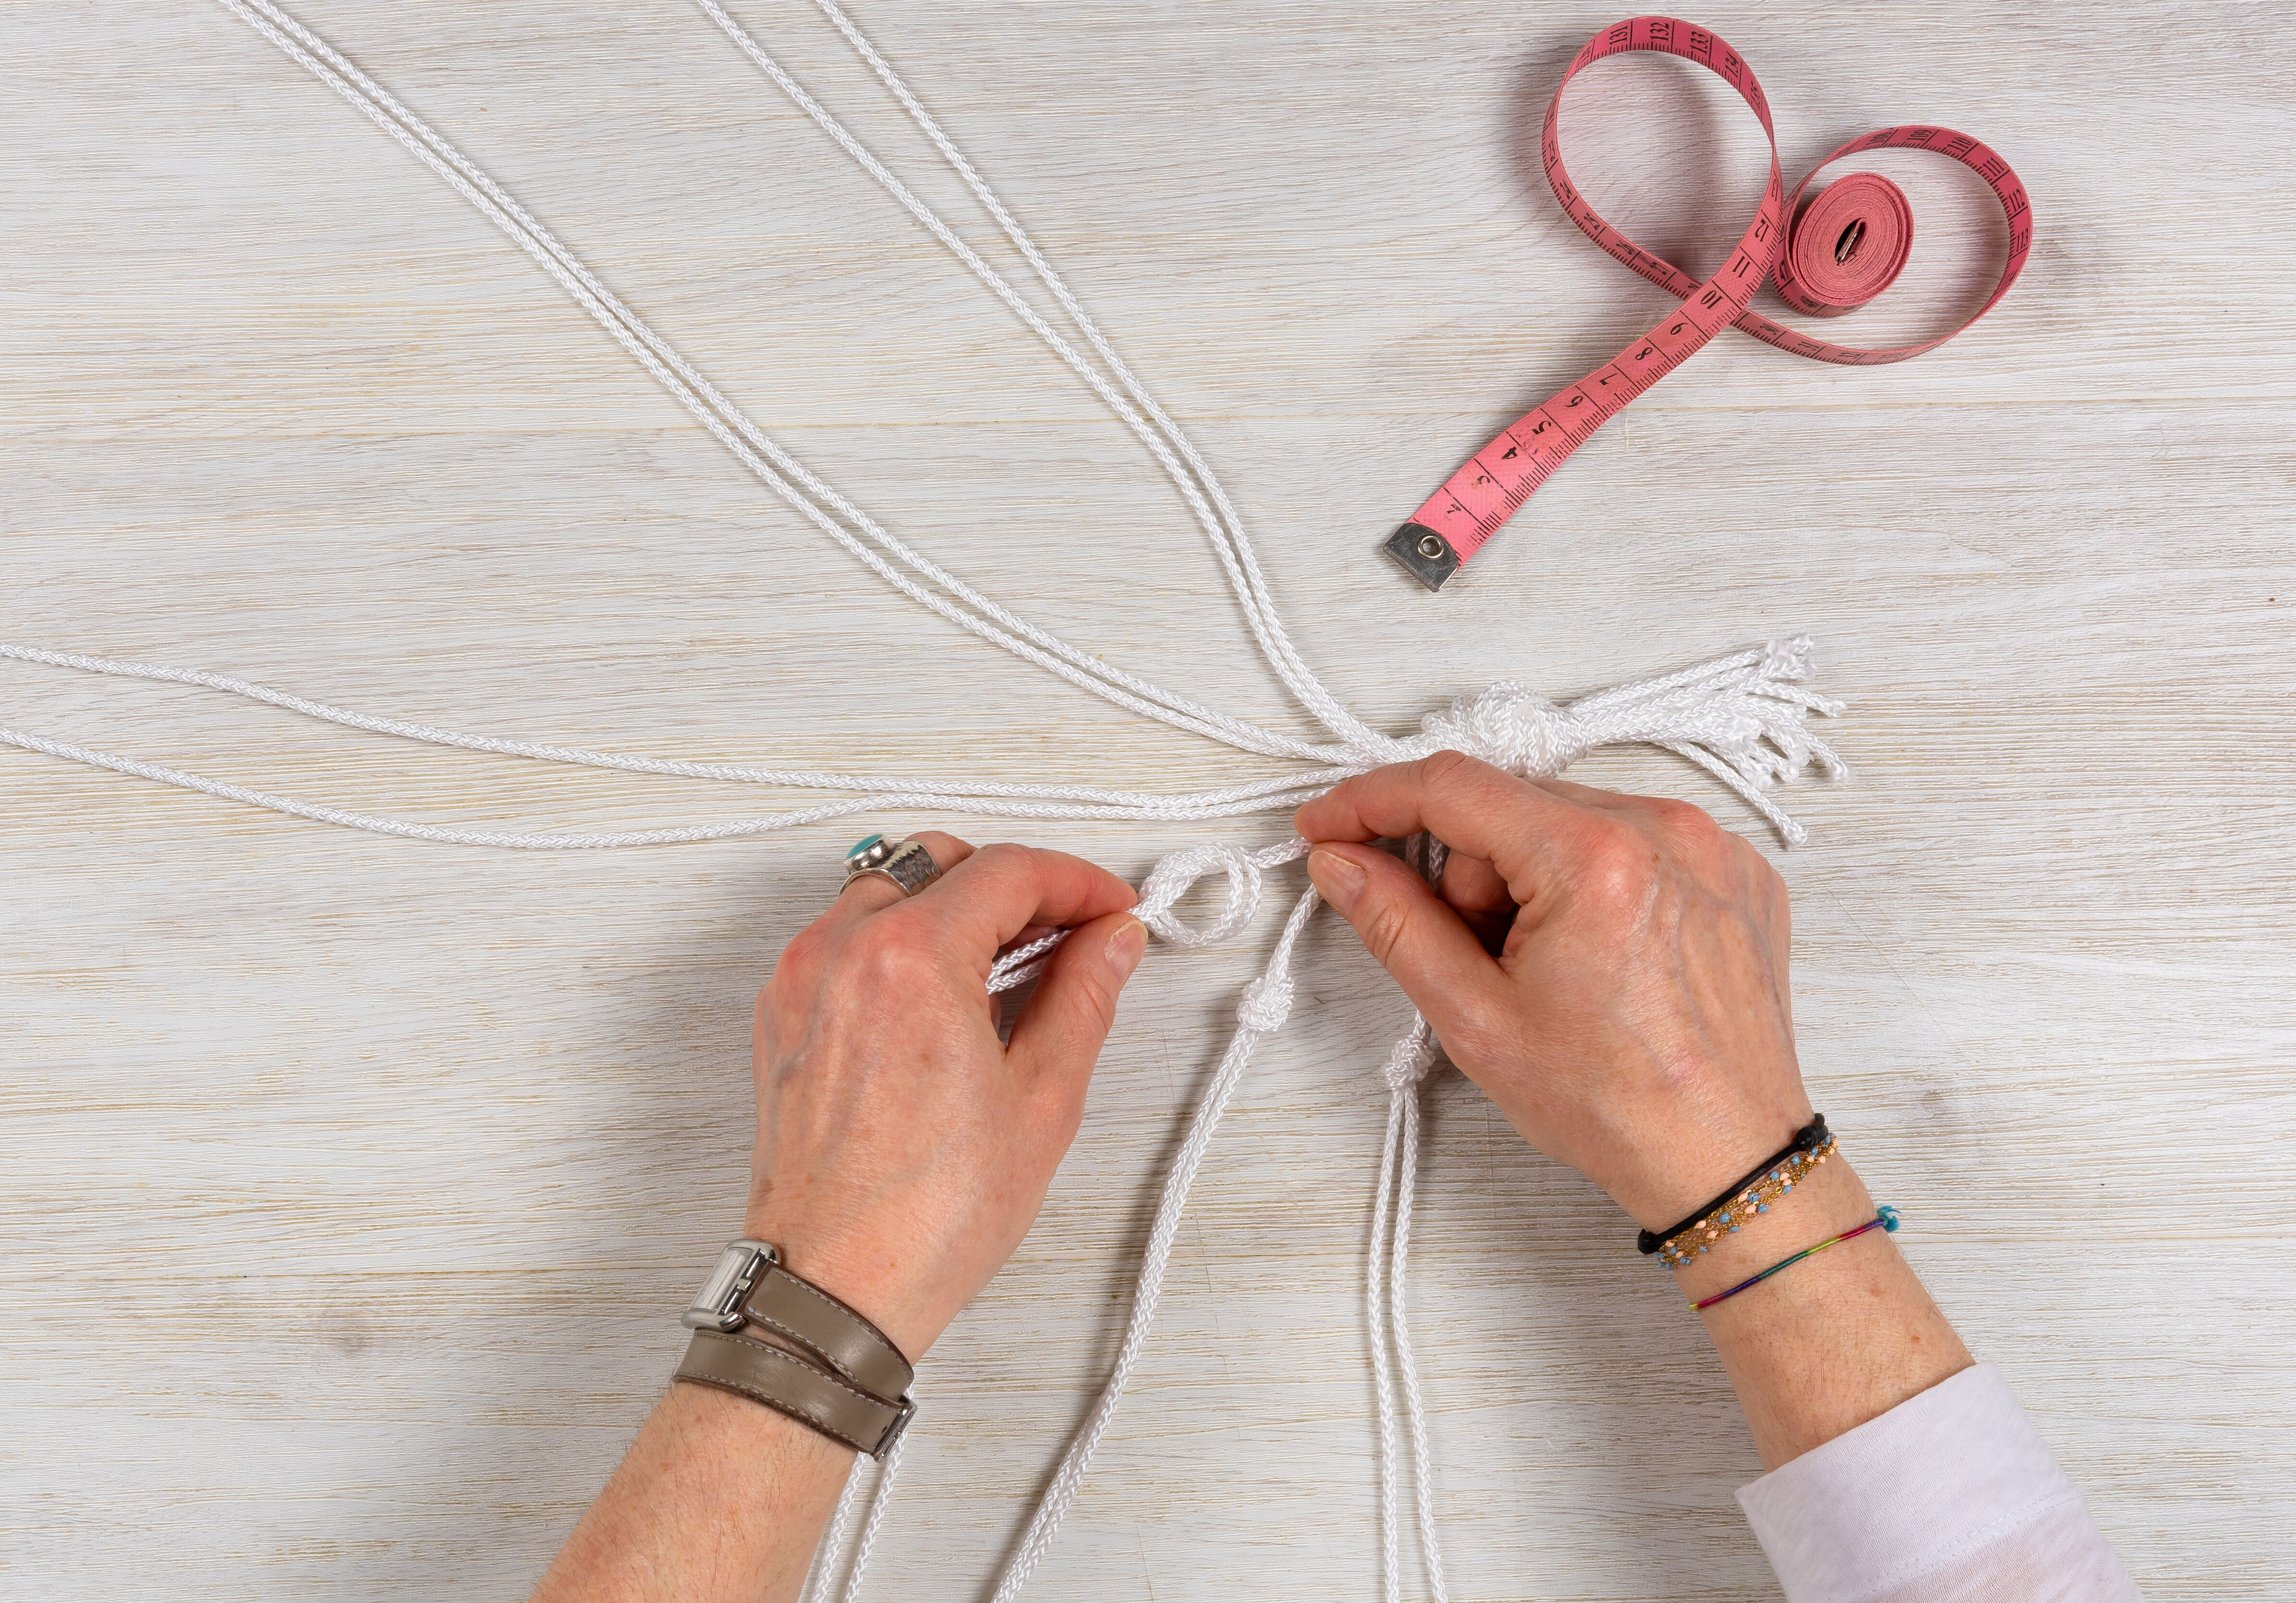

3. Then, take the pieces of cord 2 by 2, separating them so that you have 6 pairs.
Tie each pair together in a knot, around 7 cm below the large knot that you previously tied.
Tie each pair together in a knot, around 7 cm below the large knot that you previously tied.
4. Now, you’re going to make another row of knots, this time with alternate pairs of cord. Skipping the first piece of cord from your first pair, take the second piece and tie it together with the adjacent piece of cord from the second pair, around 7 cm below the previous row of knots.
Follow this pattern for the next 10 pieces of cord, tying them 2 by 2, at the same height along the row.
Follow this pattern for the next 10 pieces of cord, tying them 2 by 2, at the same height along the row.

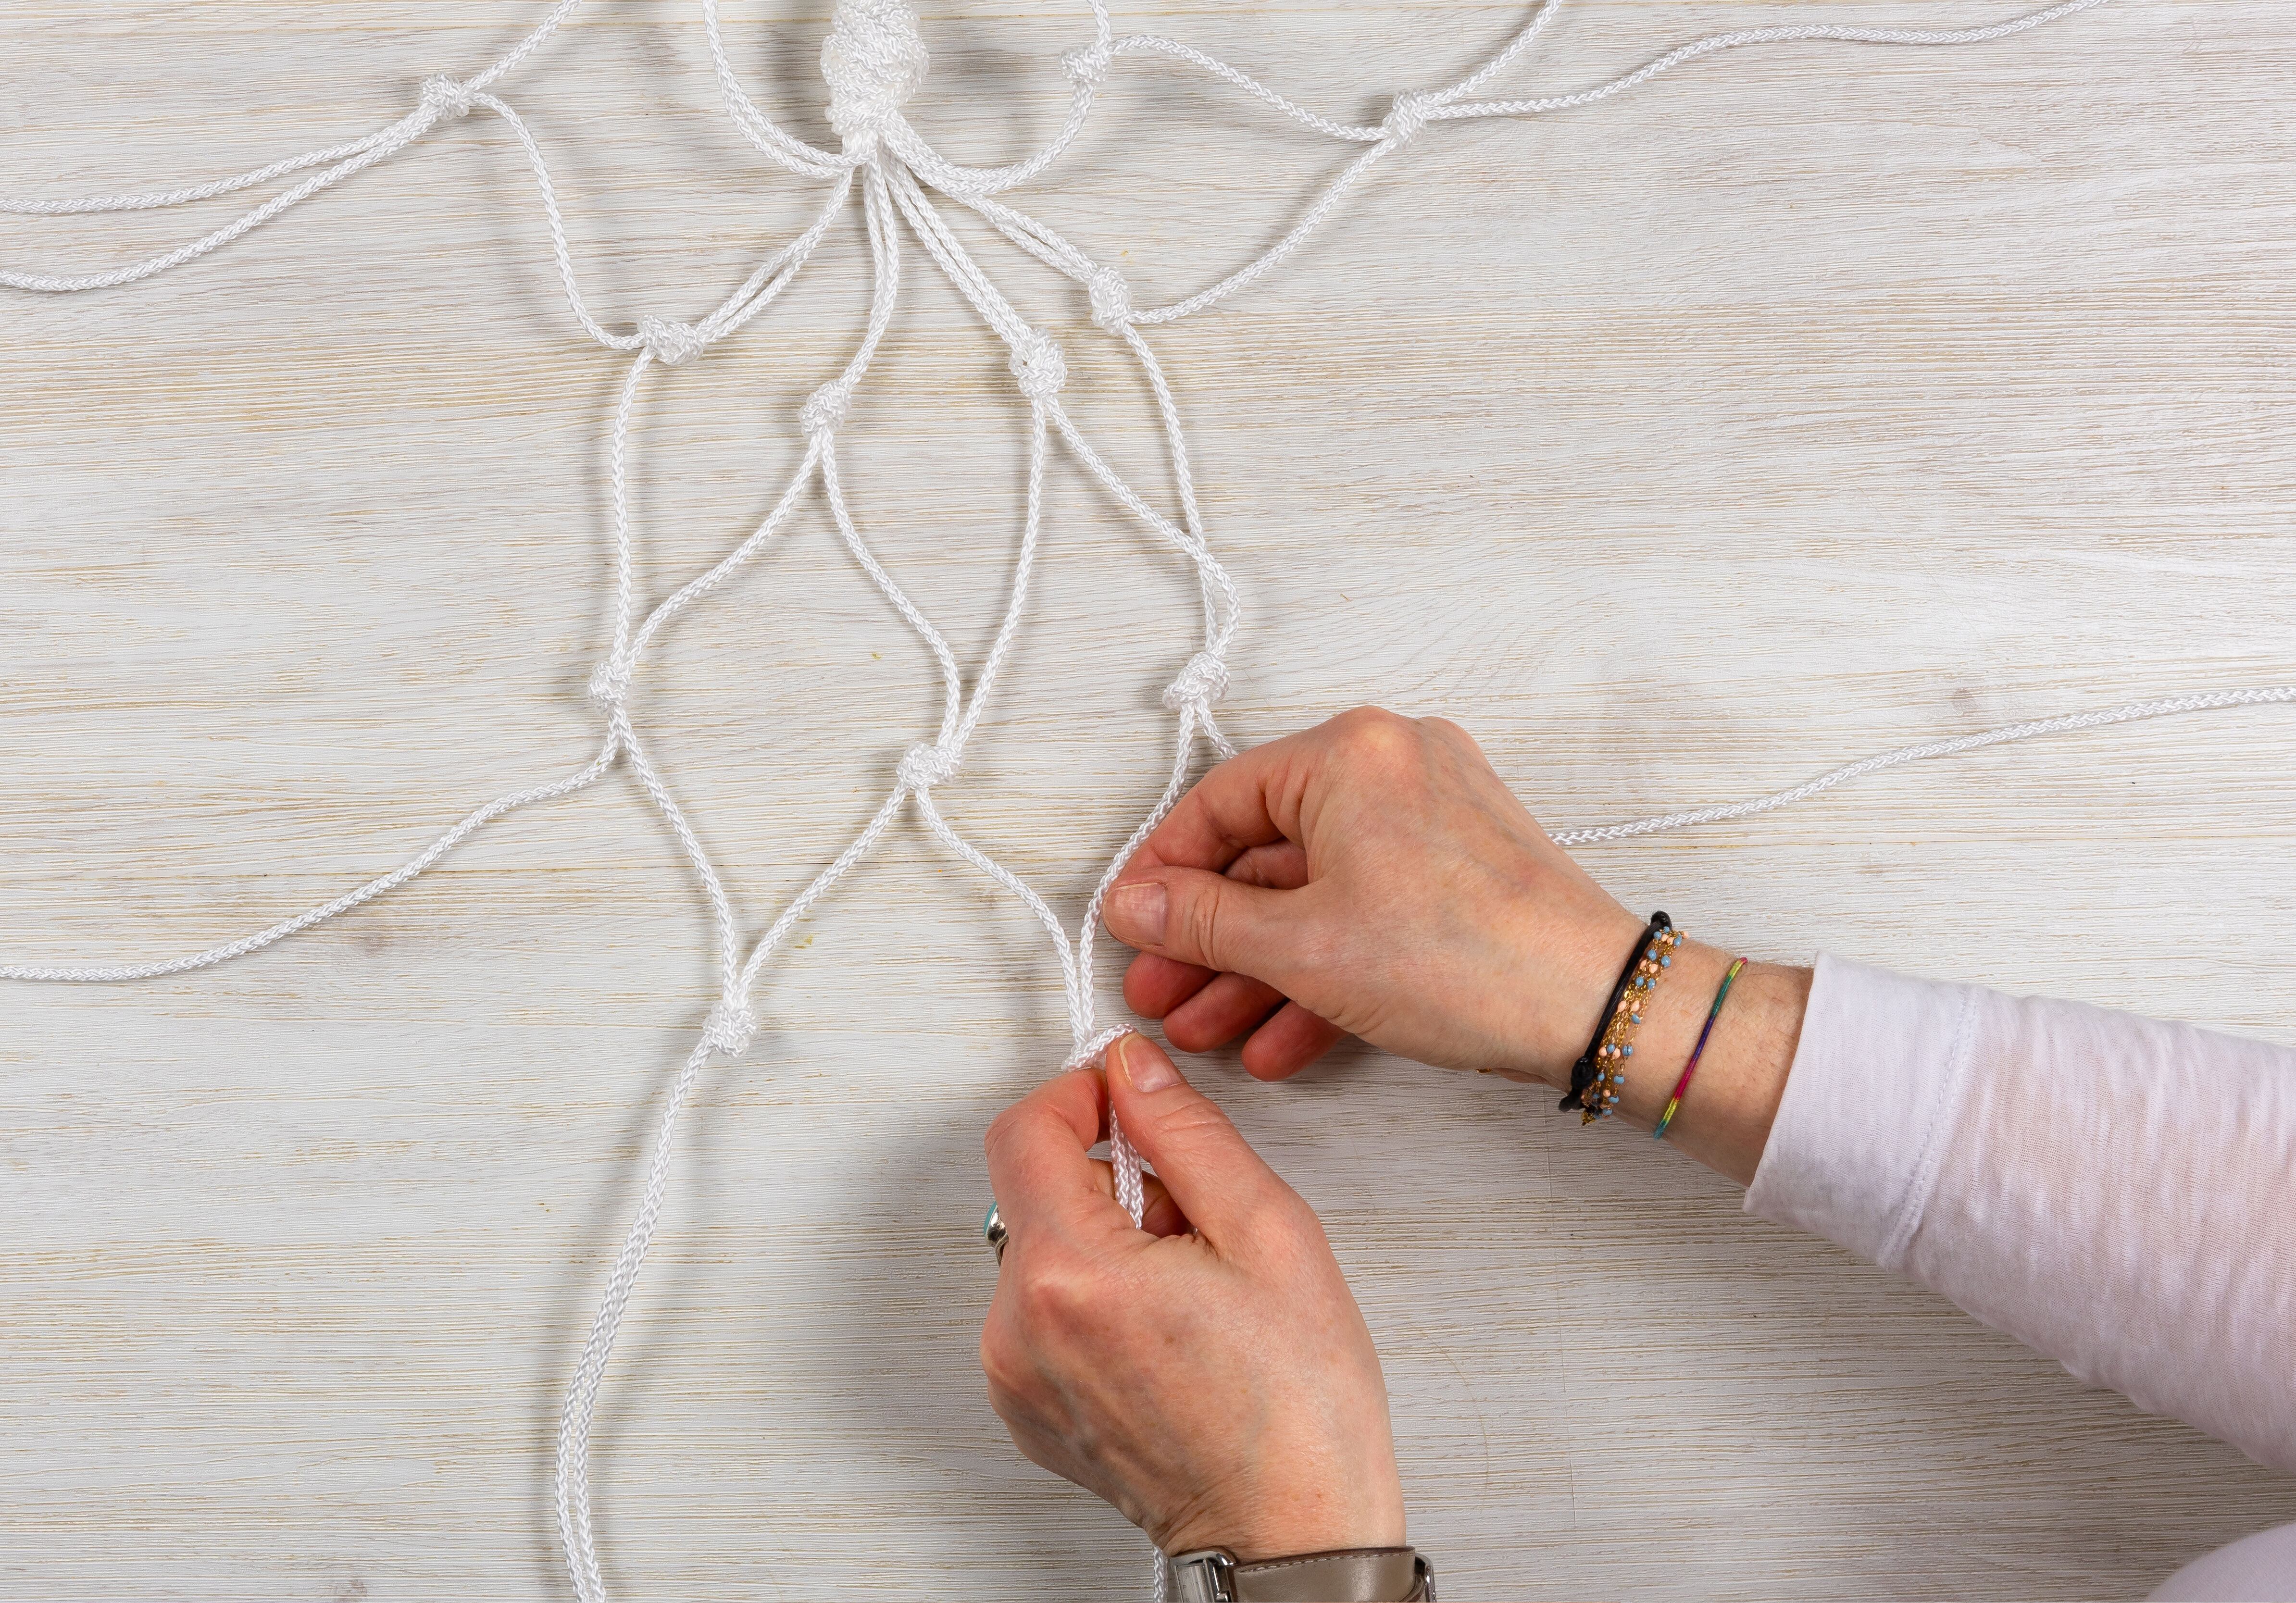
5. You will be left with one piece of cord at the end. Tie this with the piece of cord that you skipped at the start (from the first pair).
Stick to the same height as the rest of the knots in the row. The base of your hanger should now be closed, and you should start to see it taking shape!
Stick to the same height as the rest of the knots in the row. The base of your hanger should now be closed, and you should start to see it taking shape!
6. Spread your creation out into a star shape on your work surface. Around 7 cm below the row of knots you just tied, you’re going to create one final row of knots.
This time, repeating step 3, you are going to tie the 2 cords in each pair together. Continue this pattern along all 6 pairs, until the 3rd row of knots is complete.
This time, repeating step 3, you are going to tie the 2 cords in each pair together. Continue this pattern along all 6 pairs, until the 3rd row of knots is complete.
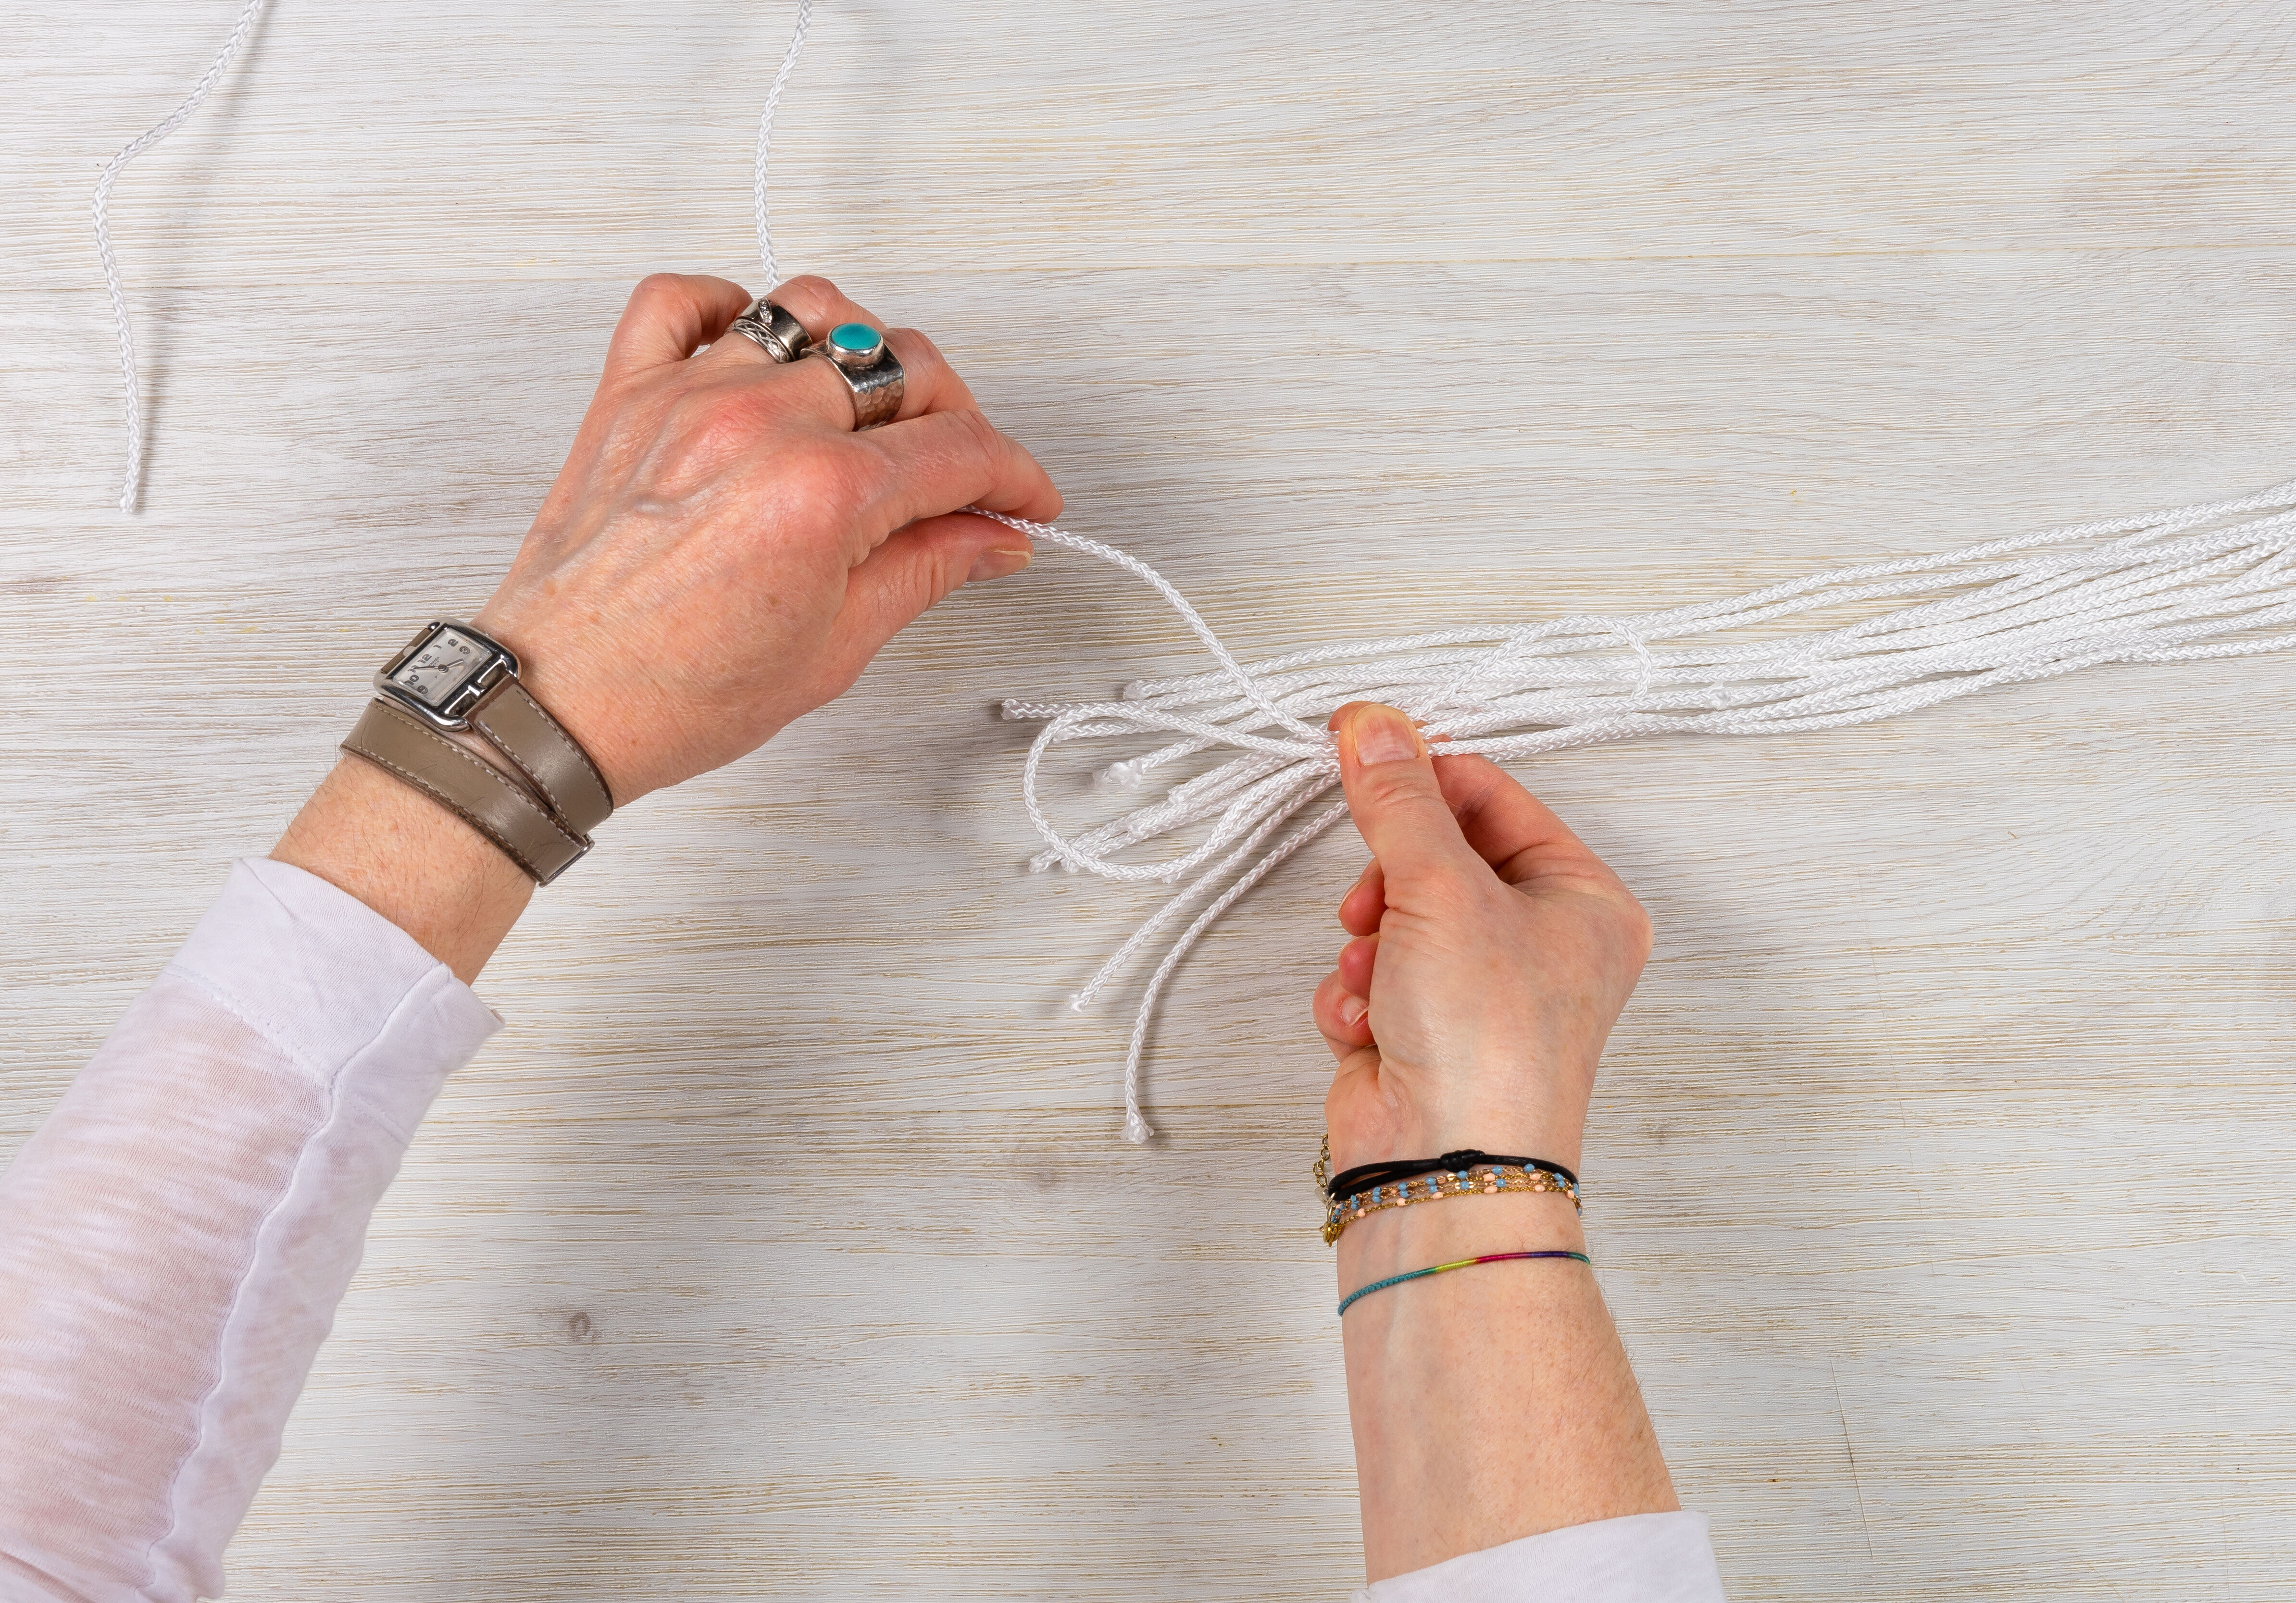
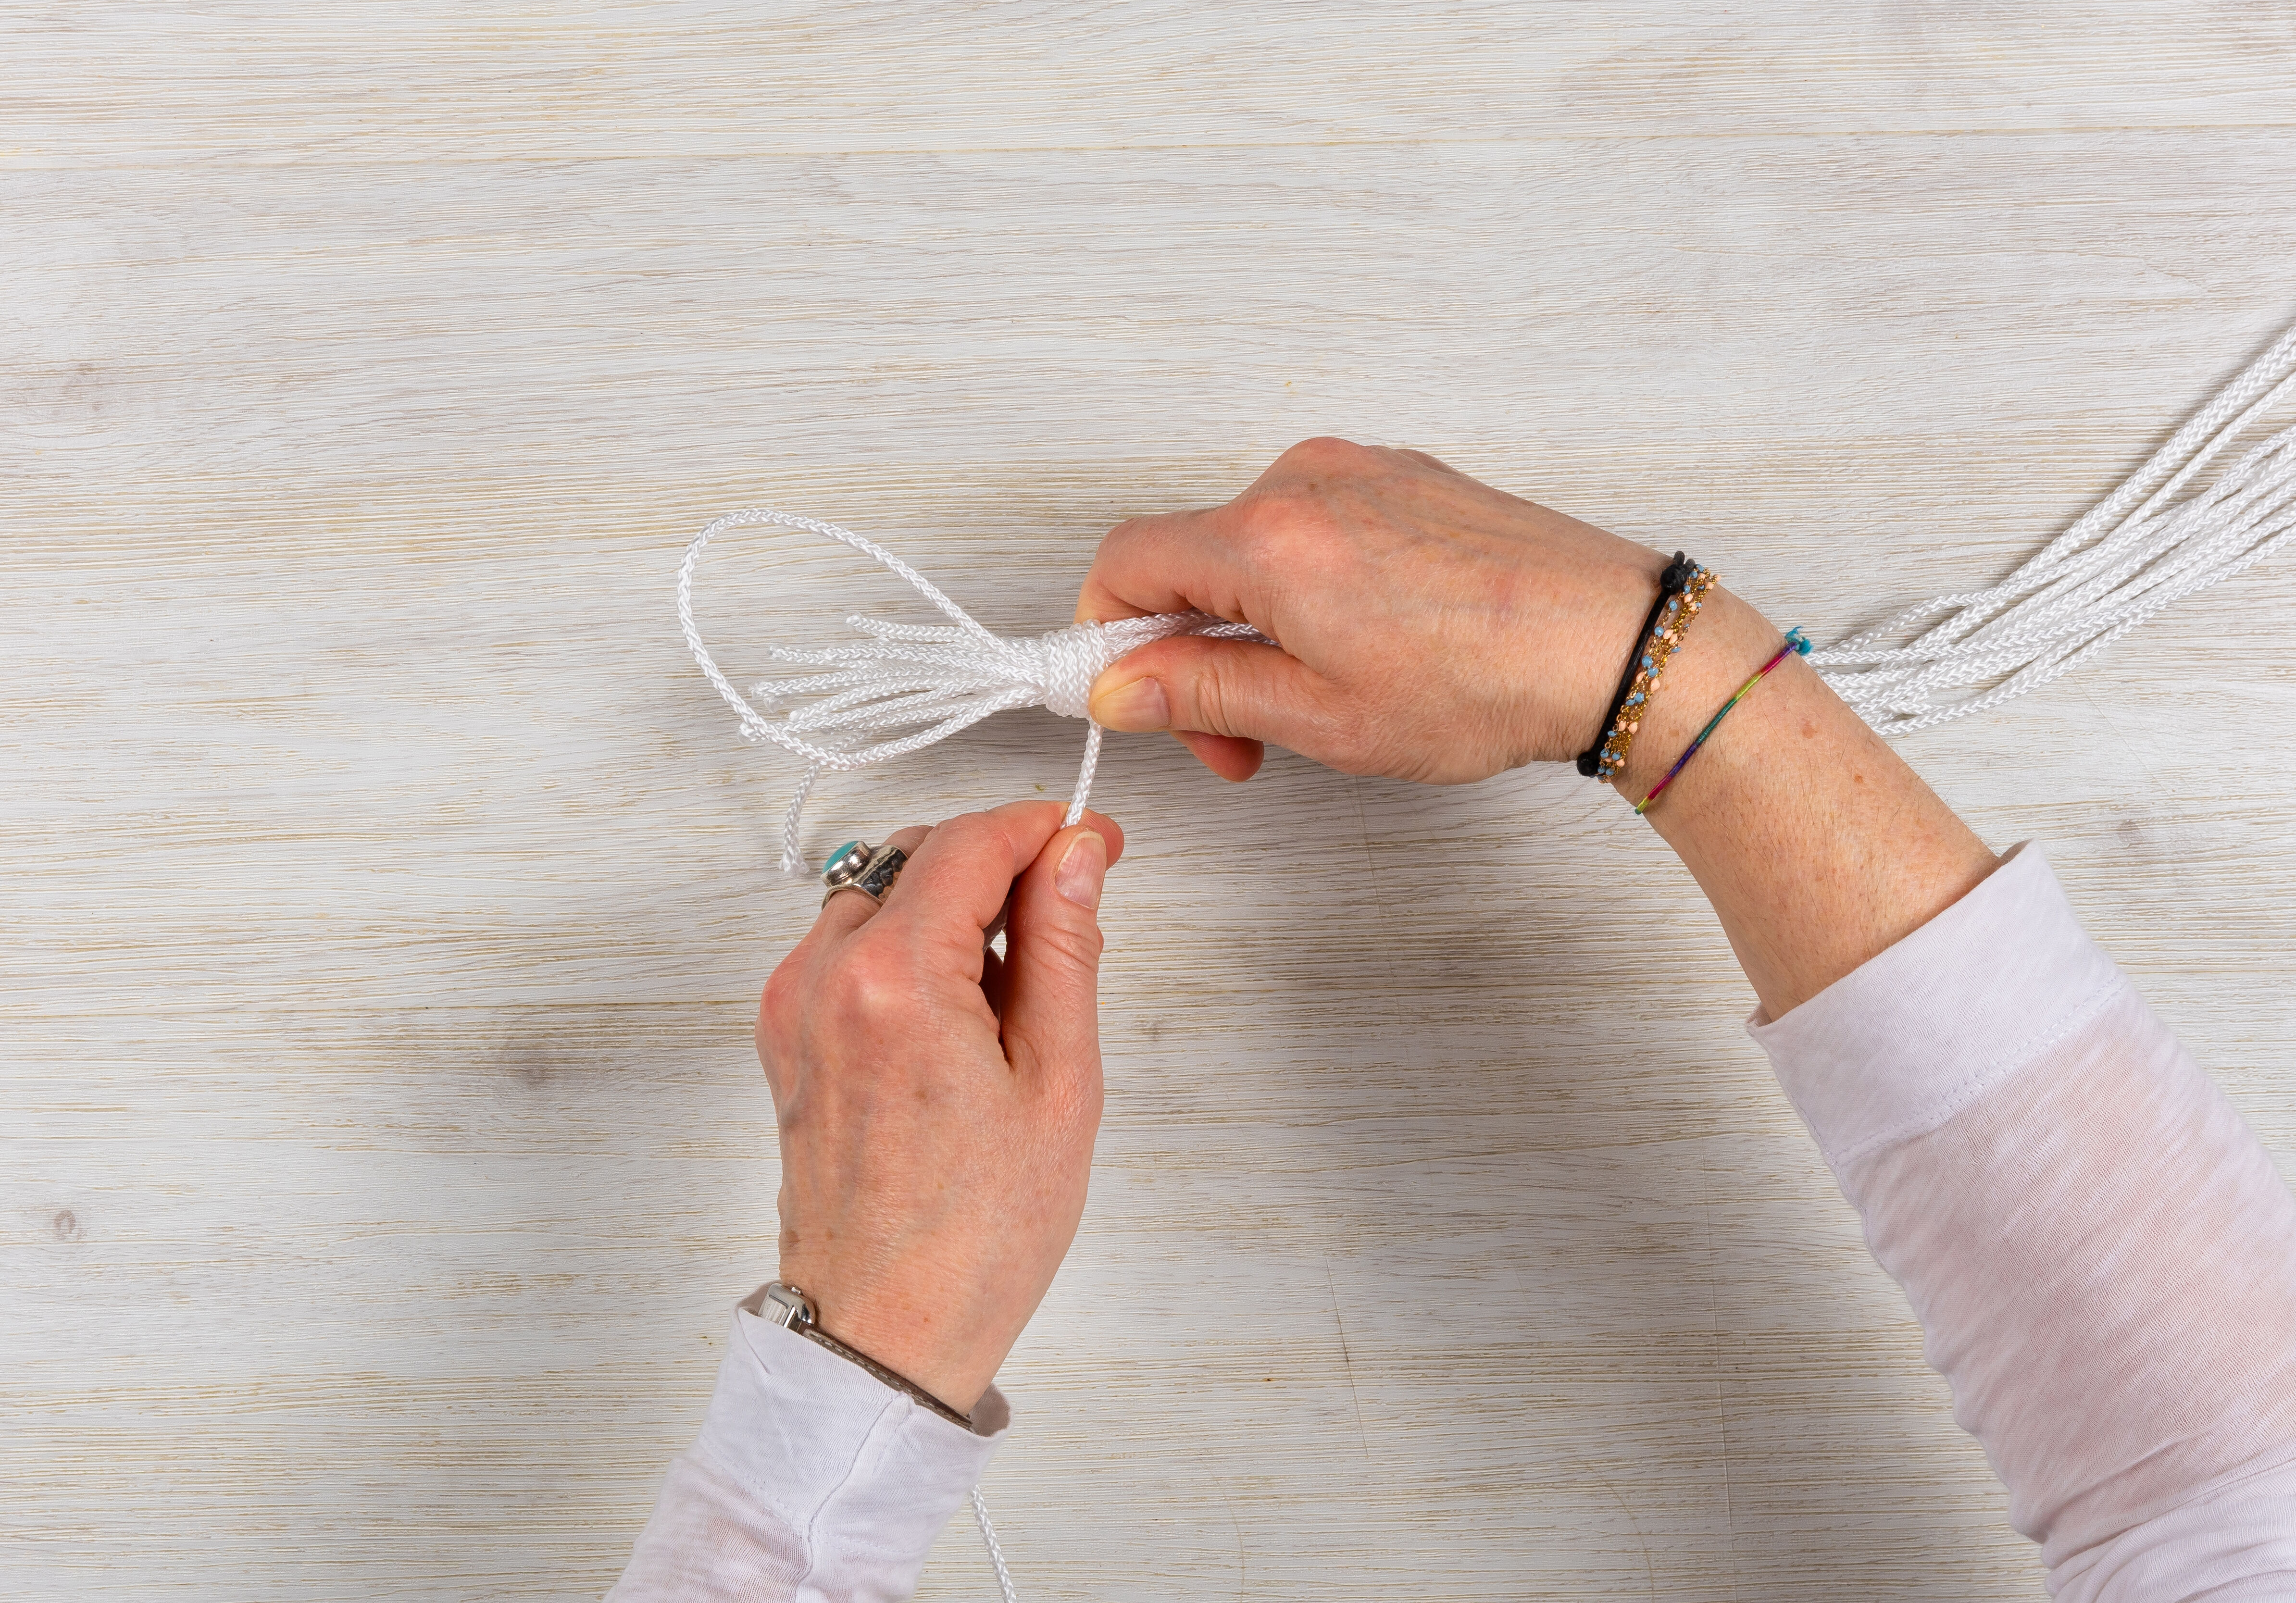
7. Once this is done, lay your creation flat on your work surface. Hold the bottom ends of the 12 pieces of cord together.
Using the piece of cord that you put aside at the very start, tie a hangman’s knot around all 12 pieces. To do so, take the loose piece of cord and bend one end of it into a figure 8 knot. Place this new figure 8 knot on top of the ends of your 12 pieces of cord.
Using the piece of cord that you put aside at the very start, tie a hangman’s knot around all 12 pieces. To do so, take the loose piece of cord and bend one end of it into a figure 8 knot. Place this new figure 8 knot on top of the ends of your 12 pieces of cord.
8. Hold the ends, with the figure 8 knot on top, then wrap the other end of the loose cord tightly around them.


9. Pass the end of the cord through the lower loop of your figure 8 knot and pull tightly to secure.
10. Your macramé hanger is complete, and you can now install your potted plant!

Teapot Plant Hanger
What you’ll need:
• 1 teapot
• A long piece of string
• 1 cork
• 1 knife
• 1 pair of scissors
• 1 potted plant


1. Take your string and tie one end around the teapot handle.
2. Based on how long you want your plant hanger to be, cut the string to your desired length, at the opposite end.


3. Using a knife, make a small groove in the cork.
4. Pass the cord through the spout, then tie it securely around the groove of the cork. Pull on the cord until the cork sits inside the spout.
5. Place your potted plant inside the teapot and hang it wherever your home needs a bit of colour!

Glass Jar Plant Hanger
What you’ll need:
• 1 glass jar with a metal clip closure
• 1 pair of scissors
• 1 spool of string
• 1 potted plant


1. Cut 3 strands of cord, all to the same length. We cut our pieces to around 80 cm each, so that the plant hanger has a suspension of approx. 40 cm.
2. Line up the 3 pieces next to one another, so that they are sitting at the same length.
Tie a knot at the top. Braid the 3 strands, starting from the knot, until you almost reach the bottom.
Tie a knot at the top. Braid the 3 strands, starting from the knot, until you almost reach the bottom.


3. Wrap the ends of the strands around the metal clip of your jar, then secure them by tying a knot. Tie the other end around the metal clip on the lid of your jar.
4. Place the plant inside and hang the jar wherever you think looks best!
It’s time to hang your creation!
So, there you have it! A super-easy and inexpensive way to add a bit of greenery to your home! And, if you’re looking for more DIY inspiration, why not check out our guide to Making a Compost Bin?